

In Evalinator, every interactive assessment is ultimately a series of questions. Each question has multiple response options with points assigned. At the end of the assessment, the goal for most of you is to calculate the total score of the respondents and place them on one or more predefined rating scales.
Note: This does not apply to a Wheel of Life type assessment used by life coaches.
In this article, we will review how to set up these rating scales, assign points to each of them and set up scoring ranges.

To allow for intuitive scoring, Evalinator allows you to set up a scoring band in 2 ways:
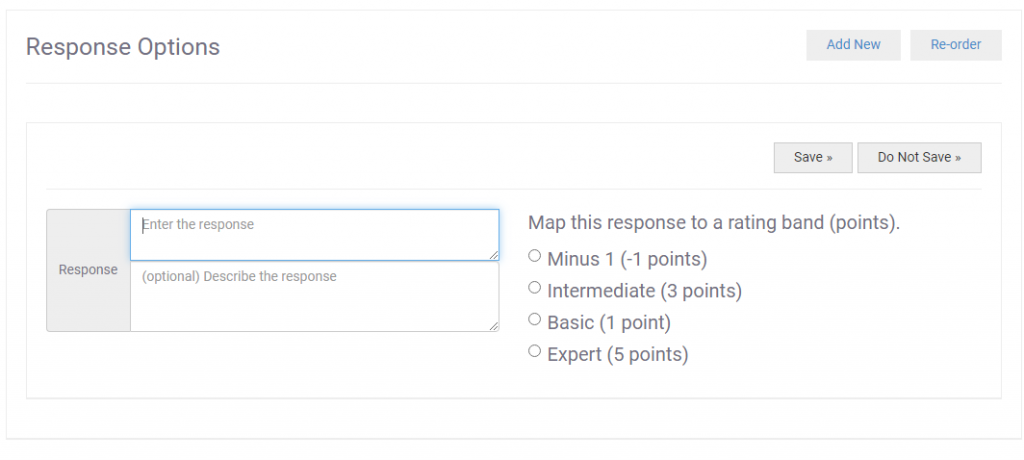
When you set up a question, each response option can be mapped to one of these rating bands – either positive or negative points. This makes it easier for you to just check the boxes instead of entering points for each individual response option.
In the below example, we have created 4 rating bands. One of them has negative points. So if you have a response option that deserves negative points, you can map that option easily.

If you have a horizontal slider-type question, then each tick on the slider represents a band with positive points only.
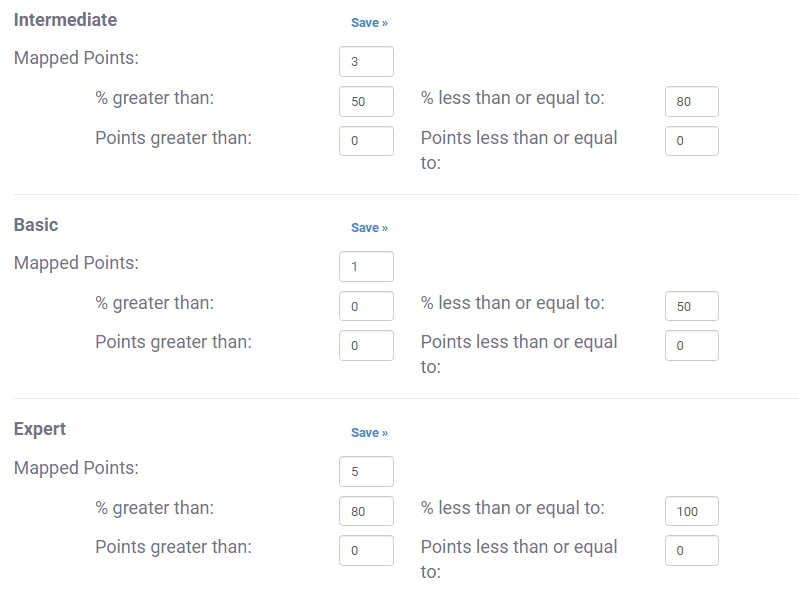
Obviously, only the bands with ranges assigned to them are used for the ultimate display of a respondent’s status.
For example, the 3 bands above – Basic, Intermediate, and Expert – will be used to display the respondent’s status depending on how they score.
Each of them has a % range assigned to them. This range is used after a respondent’s total score of the assessment has been computed.

As you can see the “Minus 1” band is not used for scoring. This band does NOT have a % range assigned to it.

So, by using a combination of the right scoring ranges (denoted as percentage or absolute points), and by assigning a positive or negative score to a scoring band, you can achieve a lot of flexibility in how you set up your interactive assessments.

Feeling frustrated with lead generation?
Take this free, 5-minute quiz and get more prospects into your leads funnel.
Instant Results. Actionable recommendations. Email required.
Find Your Score >>